Showing posts with label tutorials. Show all posts

Monday, 6 December 2010

Gift wrapping hints and tips - recycled!


Can you believe it's been a year since I was on TV showing how to decorate your parcels the upcycled way? Here's a timely reminder of my ten top tips, originally published on the Glasgow Craft Mafia blog last year, with my apologies for the dark photos:


1) Do your maths!

If you measure the longest side of your parcel, you need seven times this measurement in ribbon to create that wrapped finish – measuring before you start means you only cut off what you need each time.

2) Use your odds and ends

You can dress a plain box with that annoying last strip of paper from the roll that otherwise would go straight into the recycling. Or use your odds and ends, a couple of dabs of glue and some plain card to make a co-ordinating gift tag.

3) Think outside the box

Present too difficult/fiddly/awkward a shape to wrap? Stick it in a bag, pop a glittery bow on top, job done. Life’s too short to wrestle sticky tape.

4) Raid your tree

A teeny little bauble, felt stocking or even a handknit ornament look cute and pretty on top of your packages. And the recipient can pop them on their own tree, instead of in the bin, once the presents are all opened on Christmas morning. Or how about using mini tinsel instead of ribbon?


5) If you aren’t artistic – cheat!

There’s no shame in not being able to draw – I was kicked out of art classes at school and still managed to make a bit of a career of it! My top tip for Christmassy themed tags is to use Christmas cookie cutters as a template – just draw the outline onto a sheet of double-sided card (plain one side, patterned the other), cut out, punch a hole and you’re away.

6) You don’t need to buy fancy materials

See those cookie cutter tags I just mentioned – you don’t even need to buy the card. Use pretty packaging from toiletries or chocolates, pick up some vintage packaging from eBay, or do what we all did when we were little, use last years Christmas cards!


7) Shop from your sewing box

Great alternatives to ribbon can be found in your sewing box, or your local haberdashers. Lace trim, embroidery thread, bakers twine, even fancy yarn can make a cost-effective and visually interesting alternative to expensive glossy ribbon.

8) Use what you have

As well as re-purposing or upcycling other materials, don’t forget all those bits and pieces you have stashed away from last year. A fresh glance might inspire you to add a different type of ribbon, trim down your tags into another shape, or pop your gifts straight into the kids’ stockings, to cut down on the sheer amount of waste Christmas time can generate.

9) Do away with gift tags

You can pick up loads of letter stickers and other embellishments from shops which specialize in scrapbooking, card making or journaling. Think about adding the gift recipient name to the side of your package in stickers, or you can even cut letters out of the newspaper and stick them to the side of your gift, ransom note stylee. This is especially good for Secret Santa presents, where no-one needs to know who it’s from!

10) Have fun

Get together with friends for a gift wrapping party – a couple of glasses of something merry, a cheesy Christmas soundtrack, enough scissors and tape to go around and all your crafty ideas for making your presents stand out should make for a very festive evening. Pooling your resources will help your supplies (and your money) go a lot further!

Hop on over to my Flickr for more inspiration and lots of lovely brown parcel paper! It seems I've found a kindred spirit in a guest post over on Lupin's Bugs and Fishes blog - brown paper, check! Raid the Christmas tree, check! Use your crafting supplies, check! Good to know I'm still on trend this Christmas, too. I'll be wrapping and uploading some new photos of this year's gifts, both in their packaging, in the next few weeks, and out, once the 25th has passed.
Happy wrapping!

Tuesday, 3 August 2010

All about zines


And the July issue of Answers on a Postcard is here - pick up your copy in my Etsy shop quick sticks!


If you've ever wanted to put together your own zine, but weren't sure where to start, there's a great opportunity to learn the basics and get some pointers on where to find out more taking place in Glasgow this week. Fellow Glasgow Craft Mafia member, and long-time zine maker and collector, Marceline Smith, will be on hand this Sunday to speak about all things ziney. Alongside Jen Collins of Hello Jenuine, at the new-ish Glasgow crafts and art outlet Welcome Home, the zine workshop will take place this coming Sunday, from 2-4pm.


I'm so gutted that I'm too enormous with child to make it along, and hope that Marceline and Jen might consider re-running the session in future. I understand that a zine to accompany the day is being produced as I type, which you should be able to find alongside issues of Answers on a Postcard in the Asking for Trouble Shop.


Of course the quickest way to get involved in making a zine is to join in the with the Answers on a Postcard project. There are four issues remaining, and it's not too late to answer one or more questions in order to take part. All you have to do is drop me an email at katy [at] girlindustries [dot] com - I've skipped the punctuation here to avoid receiving lots of spam email automatically generated by machines - but just chuck an @ and a . in there to get your mail to the right place. Or leave a comment here and I'll be in touch!


Thursday, 15 July 2010

Making jam

While I've been home every day and not that mobile, I've been listening to a lot of Woman's Hour on Radio 4. I caught a programme the other week where Ghillie James talked about making preserves and decided to order her book online and see what all the fuss was about. I'm not a huge consumer of jam, mainly because I find it far too sweet, and the main thing that drew me to the book was a focus on fruit and flavour over sweetness.


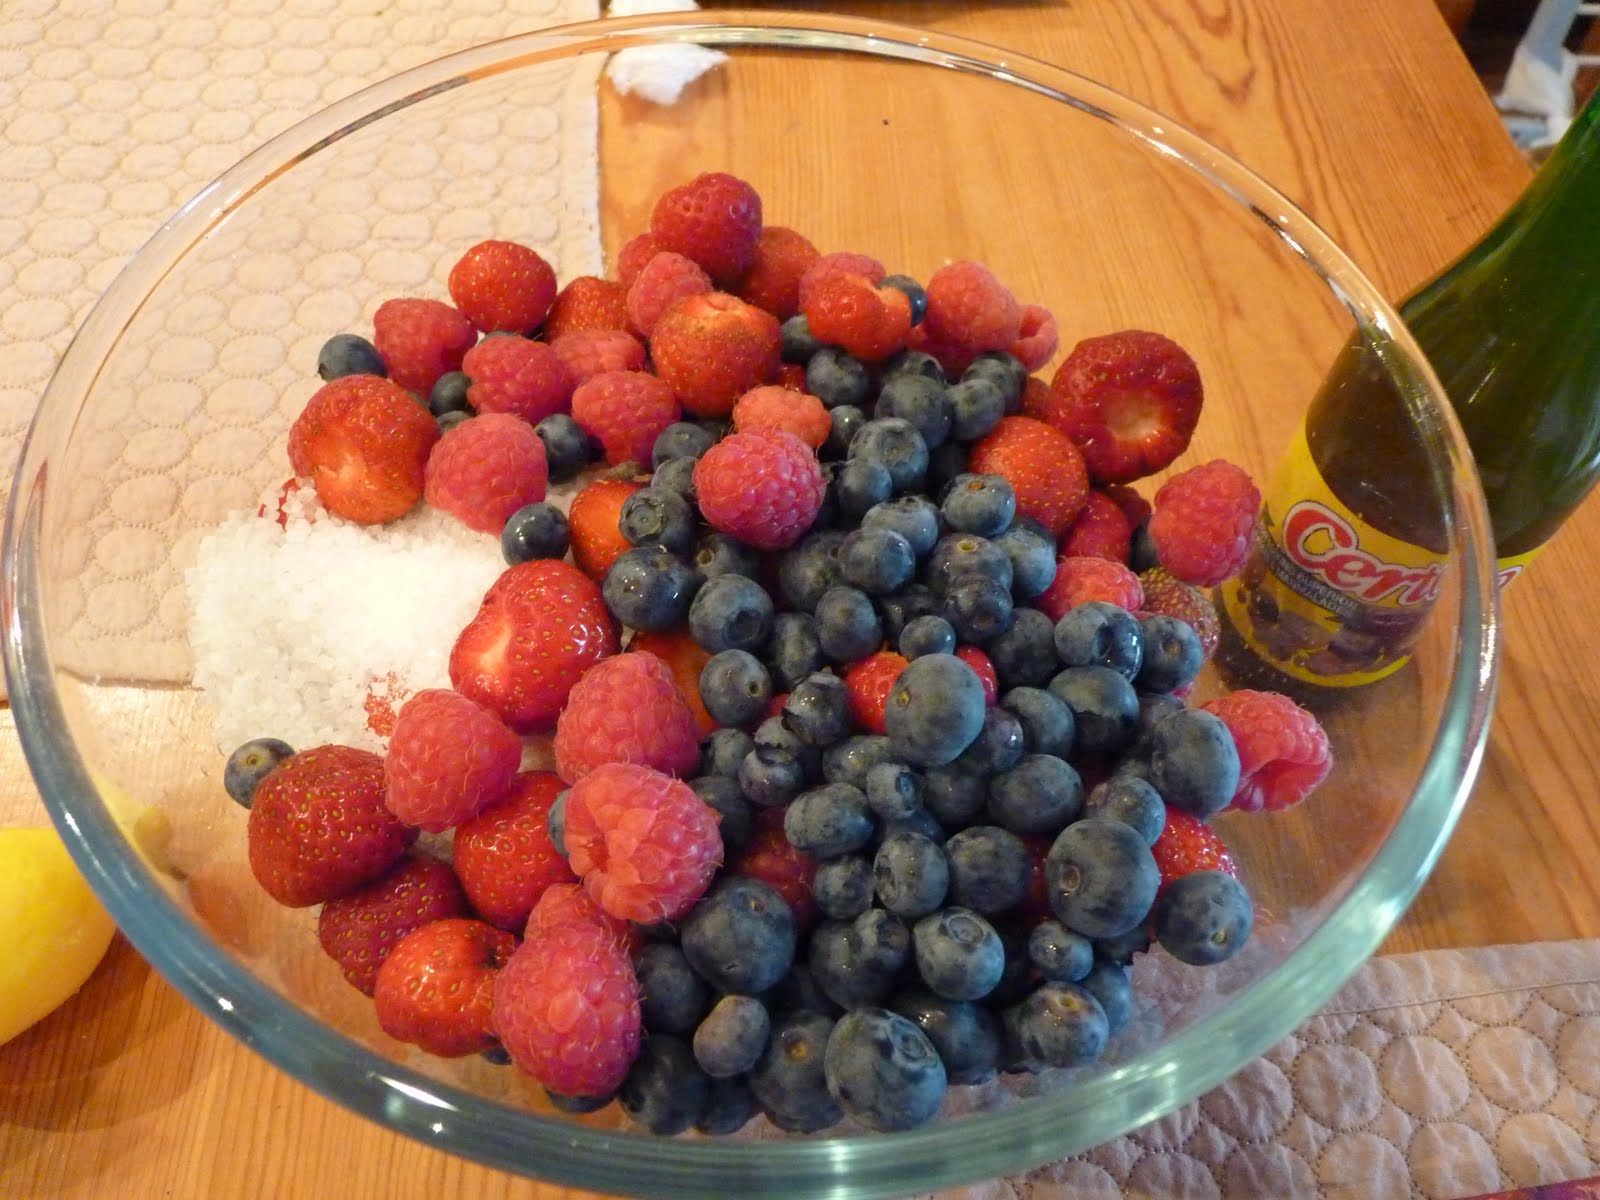
Another big plus in the jam-making process is the small number of ingredients required. I stocked up on special offer punnets of strawberries (800g), raspberries (300g) and blueberries (300g), a pack of jam-making sugar, a jif lemon and an emergency bottle of Pectin - in case it was struggling to set. Raspberries and strawberries have a low pectin content, which can prove problematic. I loosely based what I was doing on Ghillie James' recipe for muddled berry jam, reproduced for the BBC, here. I didn't add orange juice, even though we have some in the fridge, because, you know, I'm 8 months pregnant and I have to make at least one mistake in everything I do at the moment.


Rather than boiling the backside out of your fruit, Ghillie James asks instead that you leave the fruit to macerate for two hours - this releases the juices from the fruits slowly, while keeping the integrity of the flavour, and hopefully some of the nutrients intact.


The first step in the process was to layer up all the fruit, and a few squeezes of jif lemon, with a pack of jam-making sugar. The sugar had the appearance of sea salt, lovely big solid crunchy grains. Yes I did try a bit.


Halfway through the macerating process. Looking good!


Next step: transfer to a heavy pan and simmer for 10-15 minutes. I used my trusty Le Creuset because I wasn't sure how much of a good idea it was to use aluminium with acidic fruits. I can't remember science very well from school.


The fruits start to break down as the mixture starts to bubble.


Next step, boil for 10-15 minutes, until the mixture reaches 104 degrees (and I left my sugar thermometer in my old flat) or until a spoonful sets on a cold side plate.


After five minutes of boiling, I have a mild panic attack for the wellbeing of my lovely range cooker. So I split the mixture into two pans. This may have been detrimental to the jam-making process but it made cleaning up much easier. See my sterilised kilner jars in the background? They're sitting in a bain marie so that I'm not pouring hot jam into cold jars. That's a bit of science I do remember.


So, after sort of getting the jam to a setting point, stirring in about a third of a bottle of pectin to be on the safe side, then reassuring myself with Ghillie James' book that jam continues to set over the next 48 hours, I decide after 20 minutes of boiling that enough is enough and ladle the jam into three jars.


And this is what I'm left with. The next day, the jam is still a little bit wobbly in the jars, but the taste test says I've done a great job. I comfort myself with the thought that this is more of a preserve than a jam, and a million times nicer than shop-bought.
If you enjoyed this post, you might want to check out Answers on a Postcard contributor Vonnie, of Blotted Copybook and The Life Craft, and her recent adventures in tablet making.

Sunday, 6 June 2010

Look what I made!

So this pregnancy malarkey means that I've picked up a nasty habit of eating between meals, something I've spent the last ten years untraining myself to do, with varying levels of success. I've been trying very hard to stick to things that are good for me, like fruit or seeds or whatever is in my graze box, but sometimes you just need something a bit more... substantial.


So I adapted a recipe for oat and raisin cookies to use up stuff we had in the cupboards. And here's how it turned out:


If you want to make your own, here's what you need:


4 tbsp butter (see, not even that much!)

125g caster sugar (but no-one's going to tell if you use granulated, or whatever you have to hand)

1 egg, beaten (I didn't beat mine first. I don't think it mattered)

50g plain flour

1/2 tsp salt

1/2 tsp baking powder

175g rolled oats

125g dried apricots (originally raisins, but we have loads of apricots, and I didn't fancy picking the raisins out of the dried fruit mix we bought them in)

2tsp flaked almonds (originally sesame seeds but almonds just seemed like a better idea)


Start off by lightly greasing 2 baking trays with butter. Or oil spray, if you prefer. Put the oven on to 180 degrees, gas mark 4, or if you have a fan cooker like our new one (can't get used to it), about 160 degrees. Using a food processor, I then chucked in the ingredients in the following order: sugar, butter, egg, flour, salt, baking powder, oats, apricots (which I chopped in the mini food processor), almonds. This isn't how the book says to do it, but they still turned out lovely and tasty and only took me about four minutes to make.

You should manage to get about 12 dessert-spoon sized ball shapes out of these. If you cook them for 12-15 minutes in big lumps, they stay nice and chewy in the middle and crunchy on the outside. For a more biscuity, less flapjacky texture, shape them into biscuit shapes. I made half and half, and the biscuity ones went more quickly. I had to play about a bit with the timing because I'm not quite up to speed with how our oven works yet, but I took them out of the oven once I'd finished washing up, and when they started to look toasty-brownish on top.

For my next batch I'm going to use up some apples and throw in some cinnamon. What's your favourite flavour mix?

Saturday, 27 March 2010

New for Easter – Egg cosy kits!


A lovely little project for young ‘uns and more experienced crafty types alike are my new bunny egg cosy kits. All wrapped up in an upcycled egg carton, is everything you need to make these adorable little rabbits to keep your eggs nice and warm on Easter morning, and every day of the year. All you’ll need is a spare hour or so, and your own pair of scissors.

Each box contains a full colour tutorial with photos for every step, written and compiled by me, and formatted by the lovely Marceline of Asking for Trouble, who is nothing short of a genius at these things. You’ll want your eggs to dress up every single day. Once you’ve mastered the basics, why not make personalise your bunnies to match your pets? Or turn the basic pattern into yellow chicks or other easter-related (or not) creatures, depending on what yarn remnants you have available.

If you’ve ever wanted to learn how to knit on a clothes peg, this kit is for you! It’s easy as pie once you get going, and you can use the same technique to make coasters, placemats, coffee cosies, decorative trim for your gifts and parcels – all kinds of useful things. I’ll be working on a couple of tutorial PDFs to pop into the shop shortly, so keep your eyes peeled for those if you’re too late for Easter. I’d love to see any creations you make from my kits and tutorials, so drop me a line with your pictures, or leave a comment pointing to your blog or flickr pages.


Out of time, or not in the mood to be creative this Easter? Get some ready made craftiness with my hand knitted easter chicks.


Wednesday, 9 December 2009

Recap on where to buy...

Did you catch me on STV's The Hour last week? If not, don't despair, you can catch up on their online player service, here. I'm in part three, and you can watch online until the end of the year.

I showed off a few of my Christmas shopping gifts on the TV, and here is a recap of where to buy. First up is Sarey Poppins, with this perfect idea for a Christmas pressie...


If you pop one of my lavender sachets inside, your bedding smells all dreamy and relaxing as it heats next to your hot water bottle.

And how about an unique and original little something from embroidery genius Angharad Jefferson?

I know a telly addict who'd love one of these...


I also managed to show off some lovely notebooks from Pumpkinsputnik, I am addicted to her work and simply can't stop buying them any time I need a gift!

You can find the perfect gift wrapping embellishments in my etsy and folksy shops, and watch this space for details of how to make your own! I'll be sharing tips with you via Glasgow Craft Mafia in the next few days.

Monday, 14 September 2009

Recommended reading


Search out your odd socks and raid your button stash, because Sarah from The Other Mousie, has contributed a fun tutorial to a great little magazine, which is free to read online and available here.


I'm addicted to reading about the goings on in *that* London and drooling over food, cocktails and great design over at Domestic Sluttery. I love the girls' outlook on life and the fact that it's updated at regular intervals during the day - and they have great giveaways too.


Speaking of giveaways, I'm delighted to have won a beautiful bracelet over at Crystal Velvet Weddings. I'm not quite sure I have the brass neck to walk down the aisle to this, but I do have a talented Clarsach player lined up for my big entrance, so maybe it would be appropriate! I'm keeping my fingers crossed that it arrives in time for my big day. Yippee. And I'm reading the site avidly for all things weddingy. It's better than a bridal magazine!


Speaking of wedding reading, my wedding zine should be ready in just a couple of months' time, once we're back from honeymoon, and I'm working hard on the first issue of my craft inspiration zine, Answers on a Postcard, but still need interviewees, so email me at Katy [at] girlindustries [dot] com if you would like to find out more about taking part. If you're already signed up, enjoy mulling over your questions!


Tuesday, 28 July 2009

Knitting for charity


It's about that time of year again when I start to think about knitting these guys on behalf of Innocent, and their work for British charity Age Concern. Innocent have confirmed that the project is running again this year, so I'll be having a good sort out of all my odds and ends of wool and putting them to good use.

The closing date is usually some time in October, so while it seems strange to be thinking about woolly hats while it's such lovely weather out, I'll need to get cracking because I'll have to post them before the wedding, or I won't be back from honeymoon in time to send them! Wish me luck!

For those of you who can't make the October deadline, and are looking for another charity project, or those of you who have a bit more time on your hands to do your bit, get yourself over to the haberdashery counter at your nearest John Lewis. If you're like me, you won't need any encouragement (my stash grew considerably during their recent £1/ball clearance sale!). Available at every counter, on a monthly basis, are patterns for you to knit up and donate to a charity for neonatal care. I've never needed an excuse to go into John Lewis, but this clever plan means I'll be in at least every month to check out the latest project.
I'd love to hear your charity knitting projects, don't be shy and post them here.
Also, I just found this great place called Yarnbank to help you find wool for those larger charity knitting projects. What a great idea!

Sunday, 5 July 2009

Today is a day for getting things done!

I have a big long to-do list for today, and I'm going to check back in later to let you know how I get on. July is going to be my month for being a completer. And here's my list for today:

  • Download the photos on my camera 4.30pm update: DONE!
  • Upload photos taken yesterday of our outing to the countryside with Marceline, of Asking for Trouble onto the Glasgow Craft Mafia flickr member pages 5pm update: DONE!
  • Organise my own flickr and get rid of some conference photos from work that I had been saving in there 5.15pm update: DONE!
  • Finish a tutorial I've been working on for ages by remaking the item, retaking my photos and downloading the photos and making them look good 2pm update: DONE!
  • Make my entry for Rhonda's recycling contest, take a photo of it and submit said photo to the relevant flickr pool which I haven't even looked at yet, either (anyone noticing a theme here?) 11pm update NOT DONE
  • Sew up the pockets on a baby cardigan I've had in my 'to finish' box for ages 11pm update NOT DONE
  • Sew up the TP in the Park brooches I've made 6.30pm update: DONE!
  • Sew up the knitted snakes I've been making out of oddments of wool 11pm update NOT DONE
  • Make another 3 button heart decorations for the wedding so that part of the decorating is done 11pm update only managed to get 2 DONE!
  • Finish sending out the daytime invitations for my wedding to my 5 friends who have recently moved houses (this involves trimming the invitations to size, making the envelopes, putting friends' new addresses into my address book and taking a note in my wedding notebook) 3pm update: DONE! Just off to post them!

Phew! Well I think that's quite enough for now, and I'll be back later to let you know how I've been getting on.

Updated at bedtime... I think I was maybe being a bit ambitious with everything I had to do, but definitely having my readers on board to help me along the way helped out. I can head off to Aberdeen tomorrow knowing everything at home is under control! And I still managed to have fun while I was getting stuff done, too, so it didn't feel like a chore at any time.

Sunday, 31 May 2009

Upcycled mailing envelopes - a tutorial


Hey everyone,

I can't take all the credit for this one, as it's a skill I picked up from an envelope I received from Shauna, of Lemondrop Studios. However, thanks to a sunny Sunday morning, my camera and the need for a small, sturdy envelope to send a PIF across the pond, here is my own take on how to change a cereal bar box into a 'do-not-bend-velope'.


First of all, eat your cereal bars. You'll be left with an empty box, like so:


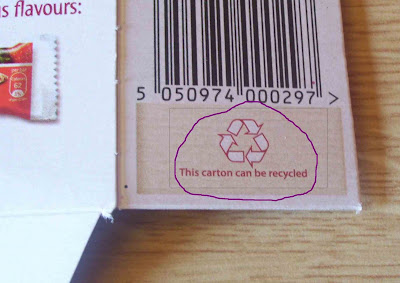
Pay attention to the packaging - this is telling me that it's okay to go ahead and recycle!


Next up, cut along one of the vertical folds, like so:


You'll be left with one long piece of cardboard. You then need to take off the entire front or back panel (up to you, you pick which). I went for the front:


If you turn the loose panel over, you can mark out where you need to trim each edge. Take about a centimetre of each side, otherwise the finished envelope will be too bulky to tape together. You also need to trim a little bit off one of the top edge, but I forgot to take a photo of that part.


Here's the same thing in inches, for my international/older readers:


Also, while you have the scissors, take off that scrappy bit at the bottom. Like this:


It's not entirely clear where I've marked it in pencil, in this photo, but you also need to cut off the corner tabs, and neaten your edges.

You can make the remaining edges look a bit more envelope-like by snipping off the corners a little. Place the trimmed front (or back!) panel onto the larger piece. We're using it that way up so our envelope is nice and blank, instead of patterned. Starting to look like an envelope yet?


Trim off the envelope's flaps where they are looking a bit raggedy. Recycled shouldn't look like it means inferior quality. All we need now is a little bit of tape. This is a bit tricky to do on your own, but if you have a paperweight, mug or heavy stapler handy, that might help you get the tape in the right place.


Et voila! A perfectly functional cardboard envelope... with a past!


Friday, 1 May 2009

Craft sellers apron tutorial

Last week I was in the throes of getting ready for my first big craft market of the season, and took time to pay attention to the wise and witty tips posted by Miso Funky on the Glasgow Craft Mafia blog.

I had been using my trusty cash box for the last few craft fairs I attended (and a plastic butty box before then - as you can see in the back left of this photo), but I decided it was time for a change, and the chance to nip to the loo or the bar without risking misplacing my takings.

With only 24 hours to go before the market, I didn't want to go out and shop for a cash belt, and there was no time to order one online. So what did I do? I put my upcycling money where my mouth was, and decided to make a cash belt out of household supplies.

Before I head over to Ikeahacker to share my lucky discovery, I thought I'd bring it to you first, in tutorial form. Buckle up, gang!

You'll need:

Ikea waffle tea towel (£1.76 for four, currently available in white)

A sewing machine and thread

Scissors

An iron (not compulsory but it did help me out)

Pins

Either a long length of fabric that you can make into a belt, a long wide strip of ribbon or, if you're as resourceful (ahem, lazy) as I am, your dressing gown belt.

A knitting needle or a kilt pin.


Okay. You will observe that the Ikea waffle tea towel is set out kind of like a grid. This is helpful. Lay it sideways on a table (iron it first if you're in the mood).

You'll notice that I wasn't in the mood for ironing at this point, but I did iron it before I sewed it, as it helped keep the edges in place.

You might also notice the kettle on the floor in my living room. We were remodelling the kitchen that week and making coffee/tea in the living room. Back to the instructions...


Fold up the bottom edge of the teatowel in line with the flat bit between the waffly bits, on the horizontal, just over a third of the way up. You know, like this:

This part will make up the pockets of the apron.

Next, you should be able to see a corresponding flat horizontal panel towards the top of the photo. Fold this down and to the back of the apron. This will be the channel that the belt goes through at the back, so bear this in mind when you go to place your pins - give yourself plenty of room!


The next bit is the bit where you pin everything. Going along the flat bits between the waffle bits means that you have a great guide for sewing in a straight line, and you can work out exactly where to put your pockets. I gave myself a pocket for a pen at either side, then three pockets for different size coins and one for notes.

Place your pins sideways on and you can sew straight over them:


Here's an action shot of me sewing using an actual sewing machine. You can hand sew it if you would prefer. I won't judge you.


Once you've done all your sewing (and did I mention I used a contrasting shade of purple and a zig zag stitch to stand out?), the next step is to sort out your belt.

There are lots of good belt tutorials all over the internet, but I was in a hurry so I grabbed the belt from my dressing gown. With the help of a knitting needle (because the channel was straight), I passed the belt through the channel I sewed through the back of the apron.


And voila! You're now ready to face the crowds at your next craft market.


Thursday, 23 April 2009

New! Required reading!

In between my preparations for the Glasgow Craft Mafia market tomorrow, I've been procrastinating by hanging out online and helping my fiance put in our new kitchen (oooh!). I've decided to round up a few new-t0-me blogs that I can totally recommend (and not just because they've featured my stuff, although that helps):

http://www.make.peazyshop.co.uk/ is a great website with all kinds of fun ideas on the cheap. They are big on repurposing and upcycling, so it's not surprising that they enjoyed my envelopes. Thanks guys!

On to the lovely Miss Crafty next. Now I'm cheating a little here, because Miss Crafty is a friend of the Glasgow Craft Mafia and I've been peeking at her blog for a little while now, but I only recently met her in the flesh, so she technically counts as new to me. I hope you will enjoy her blog, which is a great read, and is about to get even more exciting as she takes on a huge handmade project.

I'm pleased to report that I am in the middle of making something very special for the market tomorrow, and I'll be posting a tutorial on it as soon as I can write it up, so all you crafty souls with craft markets coming up, stay tuned to this blog for a tutorial on something you can't do without at your next market. In the meantime, you might want to check Miso Funky's market tips over on the Glasgow Craft Mafia website just now.

Ever struggled to find the right gift for the right person? Or do you share my obsession with coloured pencils (this site has pretty much my favourite banner ever)? Check out problem presents for lots of gift ideas!

Keeping it green in the UK is the Green Familia. They have lots of ideas for things to do with your security envelopes, or if you like, my security envelopes. Take a swatch here for more ideas.

If you'd like to treat yourself, head on over to the Lazy Giraffe. Her stunning jewellery makes me almost tempted to pierce my ears, it strikes the right balance for me between delicate and eyecatchingly bold. Deepa, from the Lazy Giraffe, came to my attention when I was, ahem, googling myself, and found this lovely mention of my envelopes. Oh come on, don't tell me you haven't done it, too?

Here's a pair of earrings from the Lazy Giraffe in my favourite colour:


Oh, and one last thing before I dash off. Laura, of Lupin Handmade, is running a giveaway on one of my favourite blogs Bugs and Fishes. It closes tonight, so dash over there RIGHT NOW if you want to win one of her star products! If you're too late, you can always pick up a craft pack in her Etsy store.


Just like the Lazy Giraffe, I have a stationery addiction going on, and check out these stunning notecards. Trees? Check! Baker's twine? Check! Roundy corners? Check! A lot of my favourite stuff is going on with these cards! Head over to the Lemon Drop Blog for an awesome giveaway where you can win this very set.


Whatever you're doing, have a great weekend!

Sunday, 19 April 2009

Easy to sew Mother's Day gift card wallet


I may have missed the boat in time for the UK Mother's Day, but for my readers on the other side of the pond, here is a quick and easy to make gift. You might even be able to put one together out of supplies you already have at home. Even better!
I gave this one to my mum on Mother's Day a few weeks ago, and it was a resounding success. To make your own, you'll need:


One large piece of felt, 12cm x 16cm (or 5 ins x 6 ins, if you only have a yardstick...),


assorted embroidery thread,


small offcuts of coloured felt (pink, yellow, green),


a needle,


two pins,


a pen,


and a spare button.


You may also wish to find a pencil and paper to sketch out your picture for the back, and a spare credit card or gift card to check your dimensions as you go.


Working from the shorter edge of the felt, fold it into three to create a wallet shape. You can use a spare credit card as a guide. Once you have the folds in place, use the pins to mark the creases. Between these pins will be the area you have to decorate. Remember to leave a margin of 0.5cm, or a quarter inch, so you can sew up the sides!


Using the small offcuts of felt, and your pencil and paper, design a picture that will be easy to attach with a simple running stitch. This technique is known as applique and is a simple way of embellishing any project. If you don't have any spare felt to hand, think about using sequins or spare buttons to create a similar effect. Using the paper to sketch it out first will help with the proportion of the design, and make sure it will fit in the space you have.


With small stitches, attach your felt, buttons or handstitched decorations to the back of the wallet. If you are using thick embroidery thread, you could sketch this out lightly on the felt with a thin pencil line for a guide, as you'll be covering it up with your stitches.


Turn over your work, and place a small cut in the centre of the thin flap at the top of the wallet. Once this hole has been made, poke your pen through to mark where you should attach the button. For a neat finish, you can make tiny stitches all around the button hole.


Open out the top flap, and sew each of the two longer sides together on either side. Using a contrasting colour of embroidery thread and small, neat stitches, makes dull stitching really stand out. If you are not confident of your sewing technique, use matching coloured thread. Your mum won't mind if it's not even, it's the thought that counts.


Stand back, enjoy your handiwork, and pop a nice surprise in there for your mum to open on her special day.